|
|
Add/Edit Employee
Adding employees is one of the initial and most important steps in IXM WEB. It consists of the following tabs -
-
IXM Time (This tab will be visible only if IXM Time license is purchased)
Screen Layout of Employee information
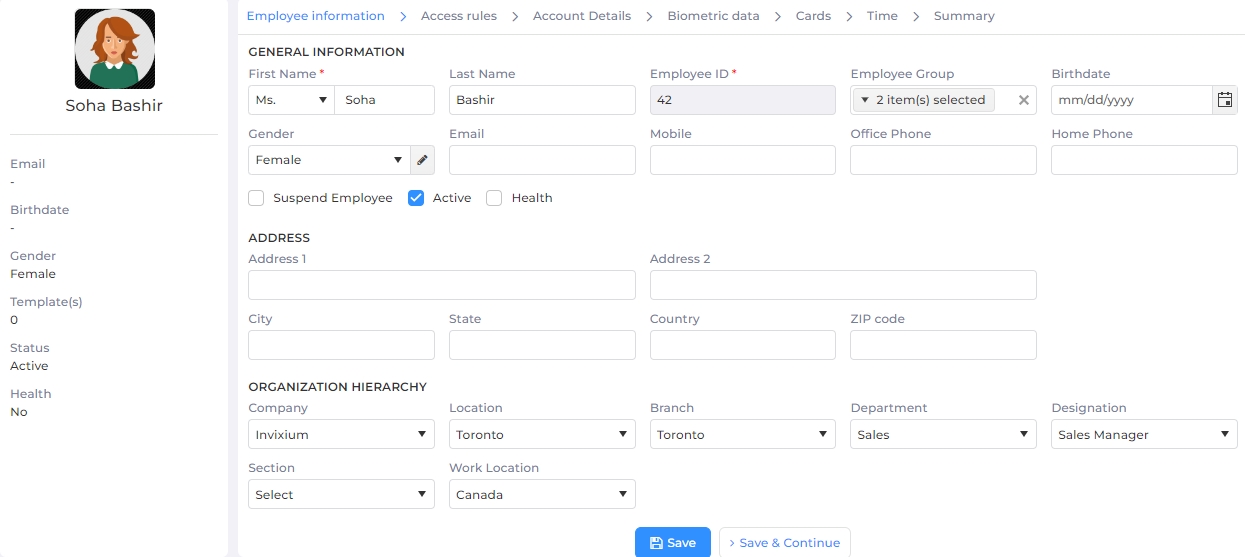
The Employee information tab is used to input personal information of employees such as Title, Gender, First Name, Last Name, Birth Date, and Employee ID. Among all these details First Name and Employee ID are mandatory fields. An administrator can input additional information about an employee such as Address – 1, Address – 2, City, State, ZIP Code, Country, Home Phone, Office Phone, Mobile, Company, Location, Branch, Department, Designation, Section, and Email (all are optional fields).
Field Description of Employee information
GENERAL INFORMATION
First Name:
Select the Title of the Employee from the dropdown list. Next, enter the First Name of the Employee.
Last Name:
Enter the Last Name of the Employee.
Employee ID:
While adding a new Employee, the application automatically displays the next sequence number. You can change it but it should be unique.
While editing an Employee, Employee ID can not be changed.
Employee Group:
Select the Group of the Employee from the dropdown list. You can keep it blank, if required.
Birthdate:
Enter the date of birth of the Employee. You can either enter the date in the format mm/dd/yy or click on the calender icon to select the date.
Gender:
Select the Gender of the Employee from the dropdown list.
You can add, edit or delete a Gender. Click on
icon to do so. Following screen will be displayed -
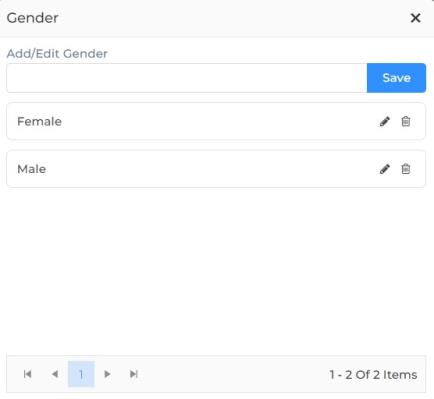
Add/Edit Gender:
To add a new Gender, enter its description in the box.
To edit a Gender, click on the
icon next to the respective Gender. The Gender will be displayed in the box. You can now edit the description.
To delete a Gender, click on the
icon next to the respective Gender. The application will display a warning message. Click on Delete button to delete the Gender or Cancel button to discard the action.
Once done, click on Save button to save the changes.
Email:
Enter the Email address of the Employee.
Mobile:
Enter the Mobile number of the Employee.
Office Phone:
Enter the Office Phone number of the Employee.
Home Phone:
Enter the Home Phone number of the Employee.
Suspend Employee
It denotes whether the Employee is suspended or not.
This feature temporarily revokes the access of an Employee. When a suspended Employee tries to authenticate on the Device, it denies access to such an Employee.
Click on the checkbox to enable or disable the feature. A check mark in the box indicates the feature is enabled. Suspended Employees are indicated by Red color in the list.
Active
It denotes whether the Employee is active or not.
Whenever a new Employee is added, the default status of that Employee will be Active. The status of an Employee can be changed from Active to Inactive when that Employee leaves the organization. As a result, following actions will be performed on that Employee -
All Biometric data of that Employee will be deleted from IXM WEB database
Employee details will be deleted from the Device and authentication will be denied
Click on the checkbox to enable or disable the feature. A check mark in the box indicates the feature is enabled.
IXM Health
It denotes whether Health feature should be available for the Employee or not.
Click on the checkbox to enable or disable the feature. A check mark in the box indicates the feature is enabled.
ADDRESS
Address 1:
Enter the Address of the Employee.
Address 2:
Enter the remaining Address of the Employee.
City:
Enter the City of the Employee.
State:
Enter the State of the Employee.
Country:
Enter the Country of the Employee.
ZIP code:
Enter the Zip code of the Employee.
ORGANIZATION HIERARCHY
This section allows to specify the Organization Hierarchy of the Employee. This information can be further used to filter data on various criteria.
Company:
Select the Company of the Employee from the dropdown list. You can keep it blank.
Location:
Select the Location of the Employee from the dropdown list. You can keep it blank.
Branch:
Select the Branch of the Employee from the dropdown list. You can keep it blank.
Department:
Select the Department of the Employee from the dropdown list. You can keep it blank.
Designation:
Select the Designation of the Employee from the dropdown list. You can keep it blank.
Section:
Select the Section of the Employee from the dropdown list. You can keep it blank.
Work Location:
Select the Work Location of the Employee from the dropdown list. You can keep it blank.
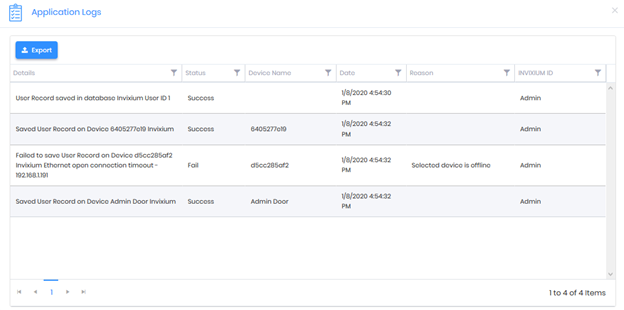
Once you have entered all the details, click on Savebutton to save details in the IXM WEB database. Upon doing so, IXM WEB will display an "Application Logs" window with a success or failure message.
Click on Save & Continue button to continue to the next section.
Screen Layout of Access Rules
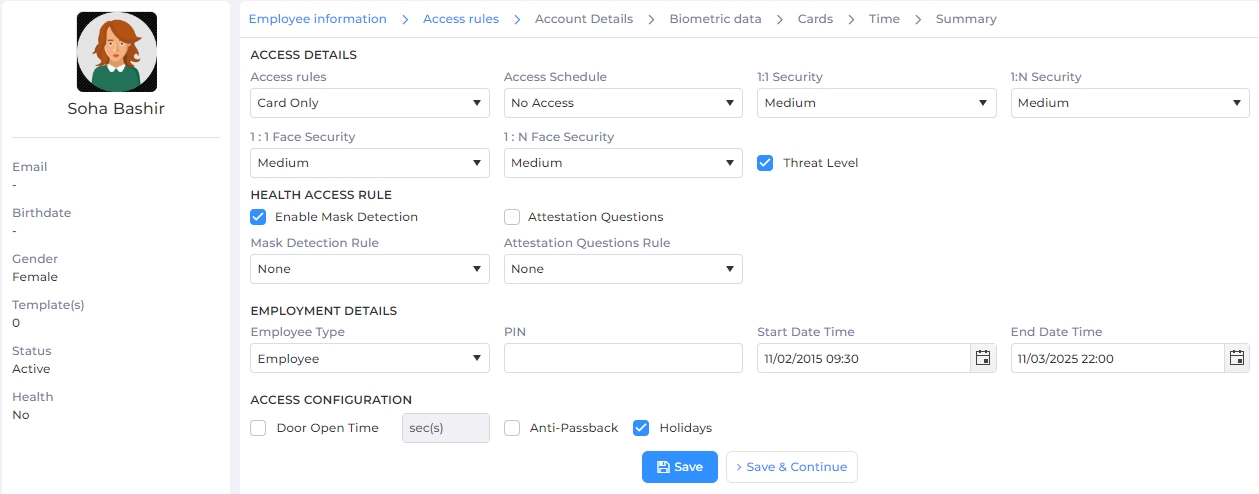
The Access Rules section is used to define the access details of individuals.
Field Description of Access Rules
ACCESS DETAILS
Access rules:
Access rules are the types of access control methods that can be used with Invixium Devices. Depending on the IXM Device and the model, administrators can assign the following access rules individually or in combination:
Biometric access i.e. fingerprints, finger vein, or face recognition
Card access i.e. access cards
PIN access i.e. a 4-digit code
ID access i.e. the Employee ID
Select the Access Rule from the dropdown list. The selected Access Rule will be assigned to the Employee and the Device will authorize Employee based on it.
Access Schedule:
The Employees configured on the Device have the right to access the facility. However, the administrators can control the access of any enrolled Employee to the facility for a specific duration. Administrators can restrict enrolled Employees based on weekends, holidays, day time, night time, etc. The Access Schedule feature has been provided for creating these access windows for different Employees.
IXM Devices are provided with 2 default Access Schedules -
No Access
Full Access
Select the Access Schedule for the Employee from the dropdown list. The Device will authorize the Employee based on the selected Access Schedule.


1:1 Security:
It denotes the security level at the time of verification process.
Select the Security level from the dropdown list. When an Employee tries to get access (using Card/ID); the device will decide based on the security level set.

Invixium recommends keeping it set to “Medium”.
1:N Security:
It denotes the security level at the time of the identification process.
Select the Security level from the dropdown list. When a Employee tries to get access (using Biometric); the device will decide based on the security level set.
Invixium recommends keeping it set to “Medium”.
1:1 Face Security:
It denotes the security level at the time of the face verification process.
Select the Security level from the dropdown list. When a Employee tries to get access (using Card/ID + Face); the device will decide based on the security level set.
Invixium recommends keeping it set to “Medium”.
1:N Face Security:
It denotes the security level at the time of the face identification process.
Select the Security level from the dropdown list. When a Employee tries to get access using face; the device will decide based on the security level set.
Invixium recommends keeping it set to “Medium”.
Threat Level
The Threat level parameter allows the administrator to specify whether the Employee is a VIP employee. A VIP employee can bypass the Threat level restrictions and access rule.
Click on the box to enable or disable the Threat Level. A check mark in the box indicates the Threat Level is enabled for the employee.
If the Threat Level is enabled, the Employee will have to follow the Threat level access rule when a threat is detected.
If the Threat Level is disabled, the Employee will be considered a VIP Employee and does not have to follow any specific access rule during the threat time.
HEALTH ACCESS RULE
Enable Mask Detection
It denotes whether the mask authentication is required or not for an Employee. Mask settings are configured at two levels in IXM WEB -
on Device level
on Employee level
The mask settings of an Employee supersedes the mask settings of a Device. This allows to enable or disable mask authentication for certain individuals irrespective of Device settings.
If the Mask Detection is enabled for an Employee and Mask Authentication is also enabled on the Device, then the mask authentication becomes compulsory for that Employee. The Device will not allow access until a mask is detected.
If the Mask Detection is disabled for an Employee then the Device will not check for mask even if Mask Authentication is enabled on that Device.
Click on the checkbox to enable or disable the feature. A check mark in the box indicates the feature is enabled.
Mask Detection Rule:
This rule is applicable only when Mask Detection is enabled.
It denotes the action that should be performed when the Mask Detection is enabled but the mask is not detected.
Select the Mask Detection Rule from the dropdown list.
If the Mask Detection Rule is set to "None", the Device Access Rule will be applicable.
If the Mask Detection Rule is set to "Allow on Fail", then the Device will allow access to the Employee even if the mask is not detected.
If the Mask Detection Rule is set to "Deny on Fail", then the Device will deny access to the Employee if the mask is not detected.
EMPLOYMENT DETAILS
Employee Type:
It denotes the type of Employee.
There are two types of Employees, regular user and an administrator.
Select the Type of Employee from the dropdown list. If an Employee requires access to the applications present on the LCD of TITAN, TOUCH 2, TFACE, or MERGE then that Employee needs to be specified as an “Administrator” user.
PIN:
It denotes the PIN of the Employee.
Enter the PIN of the Employee. This PIN will be used while authorizing the Employee on the Device if a PIN related Access Rule is selected.
Start Date Time:
It denotes the date and time from when the Device will be accessible to the Employee.
Click on the calender icon to select the date and time icon to select the time. After this start date and time, the Device will start authorizing the Employee. If it is set to blank, then the Device will not consider any start date and time for that Employee.
End Date Time:
It denotes the date and time up to when the Device will be accessible to the Employee.
Click on the calender icon to select the date and time icon to select the time. The Device will authorize the Employee till this date and time. Once this date passes, the Device will deny access to the Employee. If it is set to blank, then the Device will not consider any end date and time for that Employee.
ACCESS CONFIGURATION
Door Open Time
It denotes the time (in seconds) for which the Device will keep the door open after the authorization of an Employee on the device.
Click on the checkbox to enable or disable the feature. A check mark in the box indicates the feature is enabled.
Anti-Passback
Click on the checkbox to enable or disable the feature. A check mark in the box indicates the feature is enabled.
Holidays
If enabled this assigns holiday(s) from the selected Access Schedule to the Employee.
Once you have entered all the details, click on Savebutton to save details in the IXM WEB database. Upon doing so, IXM WEB will display an "Application Logs" window with a success or failure message.
Click on Save & Continue button to continue to the next section.
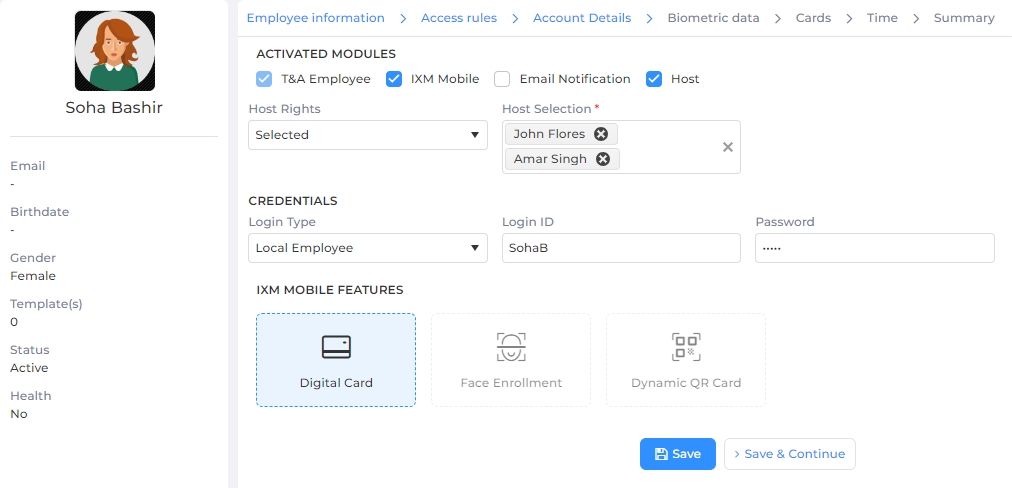
Screen Layout of Account Details
|
NOTE This tab will be visible if either IXM Mobile or IXM Time license is purchased. You can request for the IXM Mobile and IXM Time licenses from License >> click on IXM Mobile section or License >> click on IXM Time section respectively.
|
Field Description of Account Details
ACTIVATED MODULES
T & A Employee
This option will be visible only if IXM Time license is purchased.
It denotes whether Time and Attendance feature should be available for the Employee or not.Click on the checkbox to enable or disable the feature. A check mark in the box indicates the feature is enabled.
IXM Mobile
This option will be visible only if IXM Mobile Module license is purchased.
Click on the checkbox to enable or disable the feature. Enabling this feature will allow the Employee to authenticate using the IXM Mobile account. To disable IXM Mobile Account for an Employee, keep the box empty. Once, this option is selected, the following options will be displayed on the screen:
Email Notification
This option will be displayed only if IXM Mobile checkbox is selected.
Click on the checkbox to enable or disable the feature. Enabling this option will send an email to the Employee informing them to download IXM Mobile app and the credentials to log in to the app. Keep the box blank if the Employee already has log-in credentials for the app.

Host
This option will be displayed only if Visitor license is purchased.
Click on the checkbox to enable or disable the feature. If this option is enabled, the Employee will be considered as a Host for the visitors. This will allow the Employee to access the Visitor module as a Host and manage visits created by them, and manage visitor profiles.
Host Rights:
This option will be displayed only if Host is enabled.
It denotes whether the Employee is the sole Host or can have co-hosts. Co-Hosts will also be able to access the Visitor module and manage visits created by the Host Employee, and manage visitor profiles.
Select one of the following options from the dropdown list:
Select "Self" if only the Employee should be considered as a Host.
Select "Selected" if other Employee(s) should be considered as co-host along with the Host Employee.
Select "All" if all Employees should be considered as co-hosts along with the Host Employee.
Host Selection:
This option will be displayed only if Host Rights is set to "Selected".
Denotes the co-hosts for the Host Employee.
Select the Employee(s) to be specified as co-host(s) from the dropdown list.
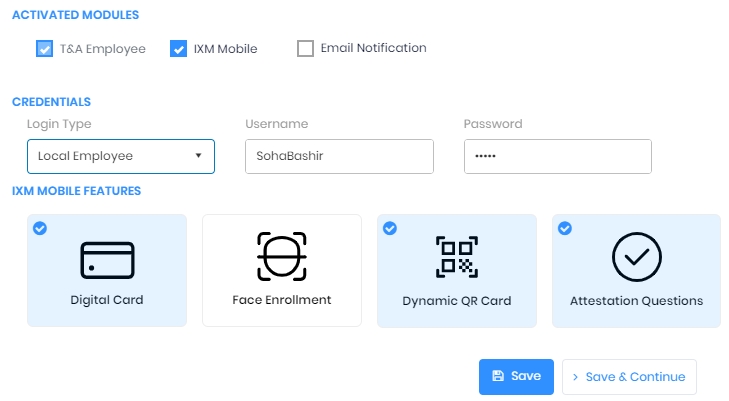
CREDENTIALS
This section allows employees to maintain single credentials to log-in to IXM Mobile app and IXM Time module provided the respective licenses have been purchased.
Login Type:
Denotes the Login Type for the Employee.IXM WEB allows to create three types of login - Local, Domain, and Azure.Select either "Local Employee", "Domain Employee", or "Azure Employee" from the dropdown list.Domain Employee:
This option will be displayed only when Login Type is selected as "Domain Employee".
Click on the checkbox to access a list of Domains and its Users. Select the appropriate Domain and User for the Employee from the dropdown list.
Login ID:
Denotes the Username to log in to IXM Mobile app / IXM Time module.
If the Login Type is selected as "Domain Employee" or "Local Employee",
By default, the Login ID will be the same as the email specified on the Employee Information tab. If not listed here, you will need to specify a Login ID in this field.
Employees can use this Login ID to log-in to IXM Mobile app. They can also use it to log-in as an "Employee" in IXM Time to track their individual records.

If the Login Type is selected as "Azure",
Enter the User Principal Name obtained from Azure Portal.
Employees can use this Login ID to log-in to IXM Mobile app. They can also use it to log-in as an "Employee" in IXM Time to track their individual records.
Password:
This option will be displayed only when Login Type is selected as "Local Employee".
Enter the Password for the Username.
SSO Login
This option will be displayed only when Login Type is selected as "Domain Employee".
Denotes whether the credentials can be used as Single Sign-On or not.
Click on the box to enable or disable the feature. A check mark in the box indicates the Employee can use the log-in credential to authenticate with multiple applications and websites.

IXM MOBILE FEATURES
|
NOTE This section will be displayed only if IXM Mobile checkbox is selected.
|
Digital Card
|
|
This option will be enabled only if Digital Card license is purchased. You can request for the License from License >> click on Digital Card section. |
Click on the box to enable or disable the feature. Enabling this feature will allow the Employee to authenticate using a Digital Card on the IXM Mobile app.
Information related to the Digital Card can be entered through Cards tab.
Face Enrollment
|
|
This option will be enabled only if Face Enrollment license is purchased. You can request for the License from License >> click on Face Enrollment section. |
Click on the box to enable or disable the feature. Enabling this feature will allow the Employee to authenticate using their Face on the IXM Mobile app. It is a very useful feature that allows Employees to enroll their face on the app at their convenience. Once face enrollment is done, Employee can authenticate using face on the Device.
Set as Profile Image
|
|
This option will be enabled only when Face Enrollment checkbox is selected. |
Click on the box to enable or disable the feature. Enabling this feature will automatically set the profile image of the Employee to the image taken during face enrollment.
Dynamic QR Card
Click on the box to enable or disable the feature. Enabling this feature will allow the Employee to authenticate using a Dynamic QR Card on the IXM Mobile app.
|
|
Information related to the Dynamic QR Card can be entered through Cards tab. |
Attestation Questions
|
|
This option will be displayed only if IXM Health is enabled from "Employee Information" tab. |
-
Increasing their footprint in a paperless world
-
Customizing multilingual questions and answers on-the-go
-
Controlling access based on individual answers
Click on the box to enable or disable the feature. Enabling this feature will allow the Employee to provide answers to the Attestation Questions on the IXM Mobile app. For this, the Attestation Questions and their answers should be first defined and transferred to device(s) from IXM Health >> Settings >> Attestation Questions Settings section. Once that is done, they should be enabled on device(s) from Devices >> General Settings >> Attestation Questions section.
Once you have entered all the details, click on Save button to save details in the IXM WEB database. Upon doing so, IXM WEB will display an "Application Logs" window with a success or failure message.
|
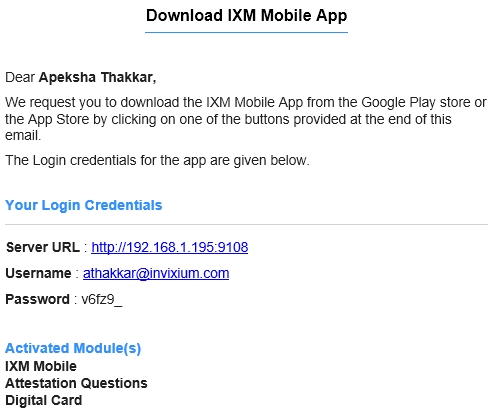
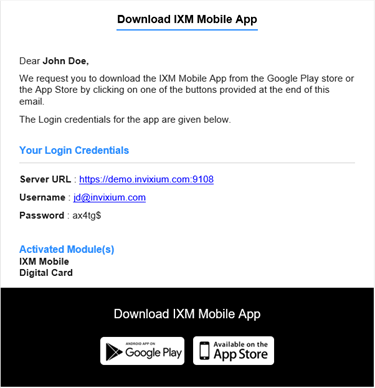
NOTE If IXM Mobile >> Email Notification checkbox is checked, an automatic email as shown below will be sent to the employee on the email configured in Employee Information tab. Employees need to download the IXM Mobile App from the Google Play Store or App Store.
|
Click on Save & Continue button to continue to the next section.
Screen Layout of Biometric data
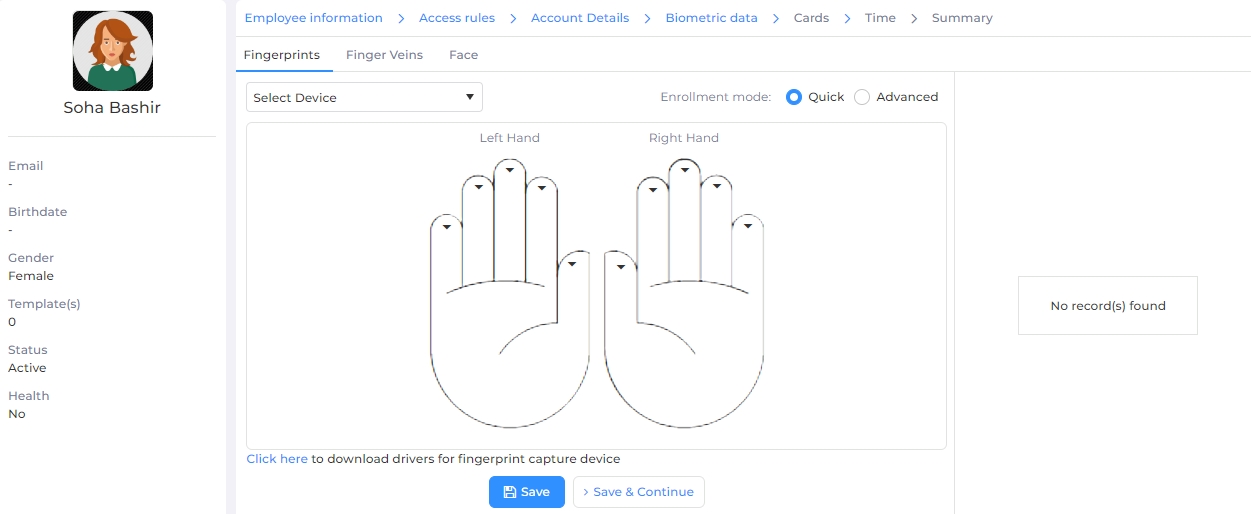
The Biometric Data section is used to capture the biometrics information of Employees.
Field Description of Biometric data
Select Device:
Select the Device on which enrollment has to be done from the dropdown list.
|
NOTE Enrollment can not continue unless a Device is selected.
|
Next, click on the type of enrollment that has to be done: Fingerprints, Finger Veins, Face or Cards. Apart from these, you can also enroll Employees by using a USB Desktop Sensor.
Follow the steps mentioned below -
Enrollment mode:
Select one of the following options to enroll an Employee-
Quick
Click on this option for a quick enrollment. This is the default selected option.
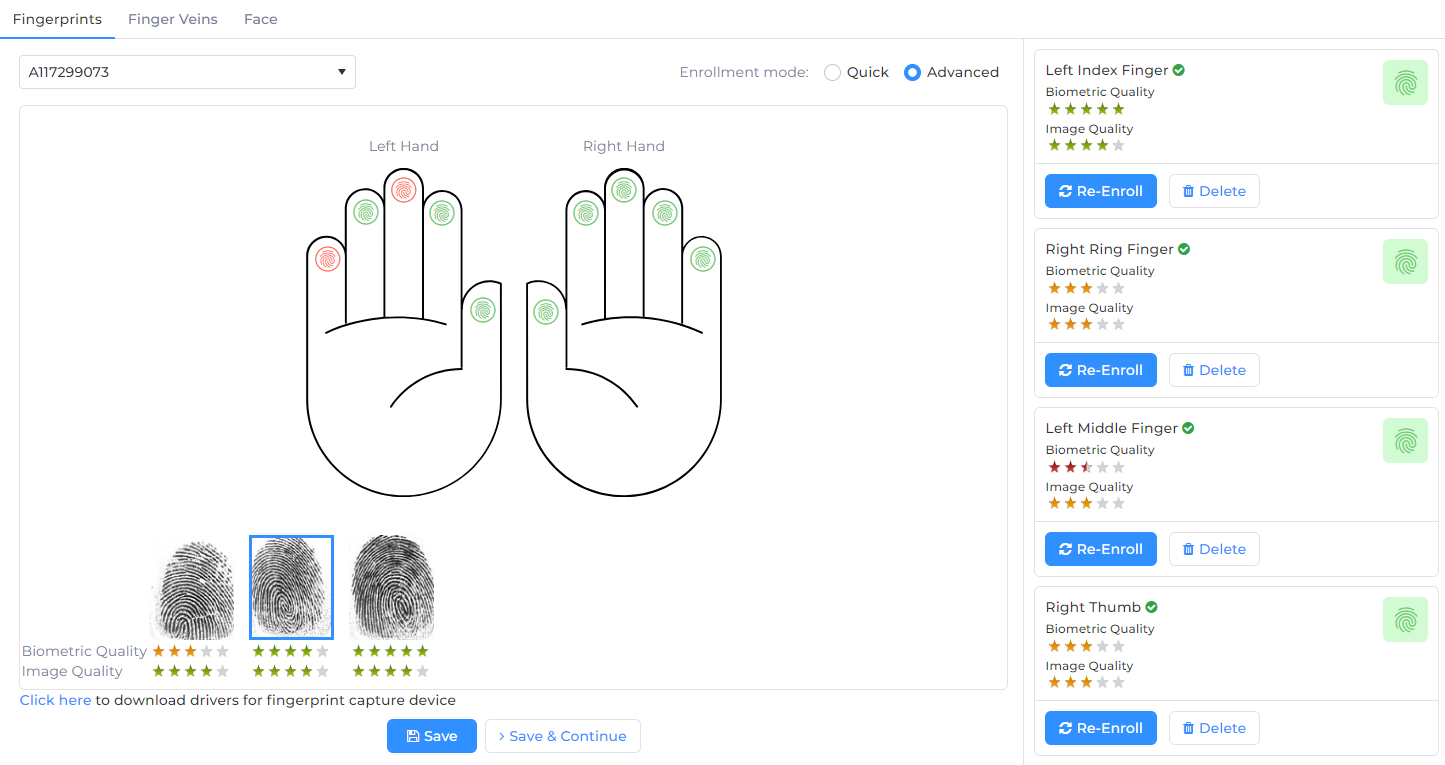
Advanced
Click on this option to enable advance enrollment.
STEP 1:Hover the cursor over the two hands and click on the finger which you want to enroll for the Employee. A “Place Finger” message will be displayed. Ask the Employee to place their finger on the device.
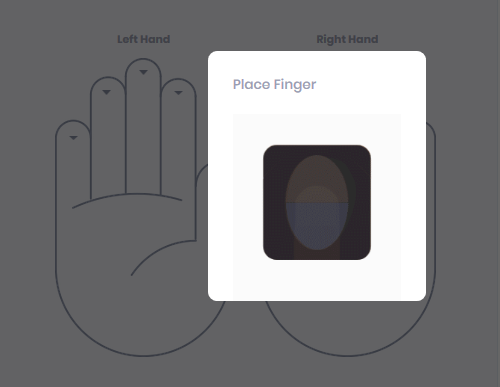
In case of Advanced enrollment, the application will ask the Employee to place the selected finger 3 times. Each time the IXM WEB will notify the Employee by displaying the “Place Finger” message.
STEP 2:
In case of Quick enrollment, once the finger is scanned, the device will show a “Remove Finger” message and the fingerprint image will be displayed on the right side of the window along with the image quality.
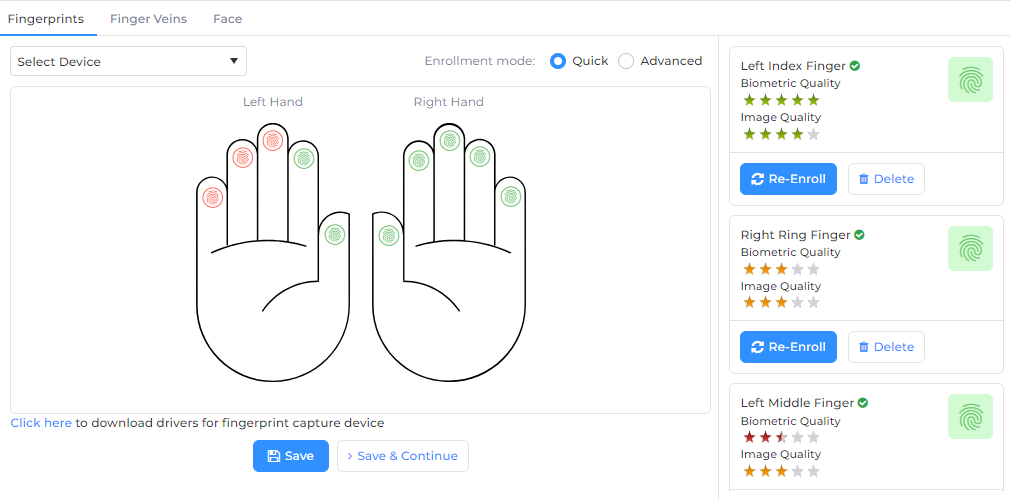
In case of Advanced enrollment, once all 3 attempts are captured, IXM WEB will display the captured fingerprint image of each attempt and select the capture with the best quality for each finger.
NOTE Invixium recommends that each employee be enrolled with a quality of at least 4 stars for all biometrics. To achieve this, it is very important to place the finger in a way that the whole sensor area gets covered and the ridge of the finger touches the slightly engraved portion of the fingerprint sensor.
STEP 3:
After enrollment of all the required fingers, click on Savebutton to save details in the IXM WEB database. Upon doing so, IXM WEB will display an "Application Logs" window with a success or failure message.
Click on Save & Continue button to continue to the next section.
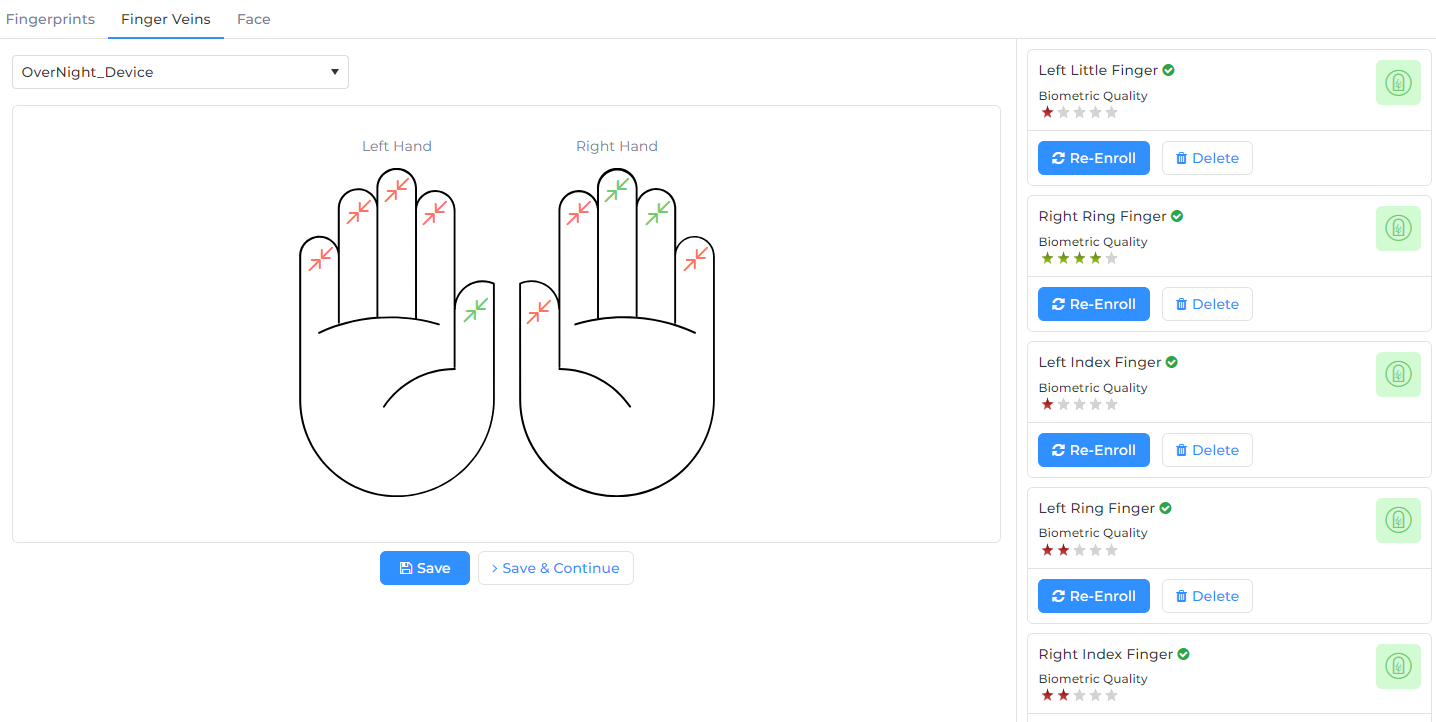
Follow the steps mentioned below -
STEP 1:
Hover the cursor over the two hands and click on the finger which you want to enroll for the Employee. A “Place Finger” message will be displayed. Ask the Employee to place their finger on the device.
STEP 2:
Once the finger is scanned, the device will show a “Remove Finger” message and the fingerprint image will be displayed on the right side of the window along with the image quality.
|
NOTE Invixium recommends using the index and middle fingers for enrollment, and that each employee is enrolled with a quality of at least 4 stars for all biometrics. To achieve this, it is very important to place the finger so that it is completely straight and the tip of the finger rests on the guide at the back of the finger vein cavity. |
STEP 3:
After enrollment of all the required fingers, click on Savebutton to save details in the IXM WEB database. Upon doing so, IXM WEB will display an "Application Logs" window with a success or failure message.

Click on Save & Continue button to continue to the next section.
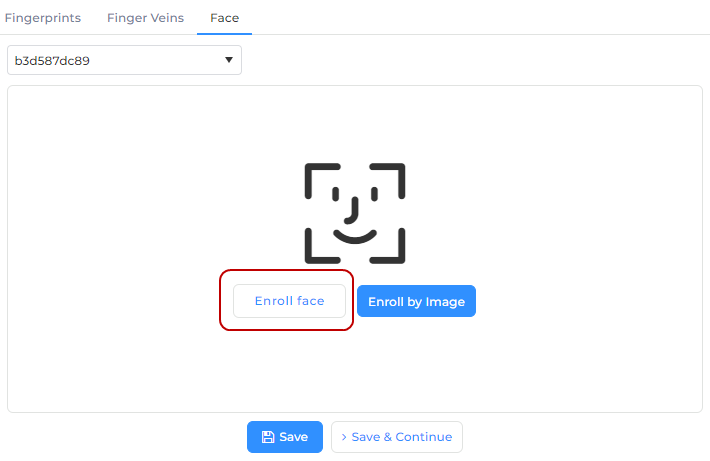
Face enrollment can be done in two ways:
-
Directly from a Device. Read more...
-
By using an existing image (this option is available only if IXM Face Convert license is purchased). Read more...
To enroll face from a Device, follow the steps mentioned below:
STEP 1:
Click on Enroll Face to start face enrollment.
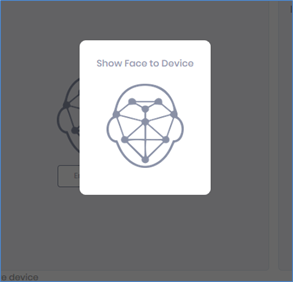
STEP 2:
The application will show a "Show Face to Device" message. The Employee should look straight at the camera when enrolling in their face. Avoid looking in other directions or turning your head during enrollment. Make sure the entire face is within the frame corners, which will turn green upon correct positioning.
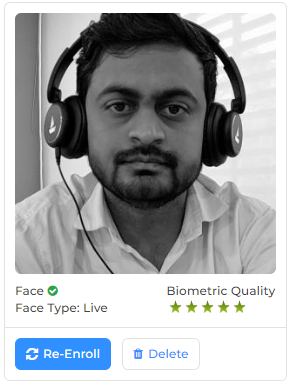
STEP 3:
Once the device captures a face, the employee's face will be displayed on the right side of the application along with the Biometric Quality and Face Type (Live or Spoof).
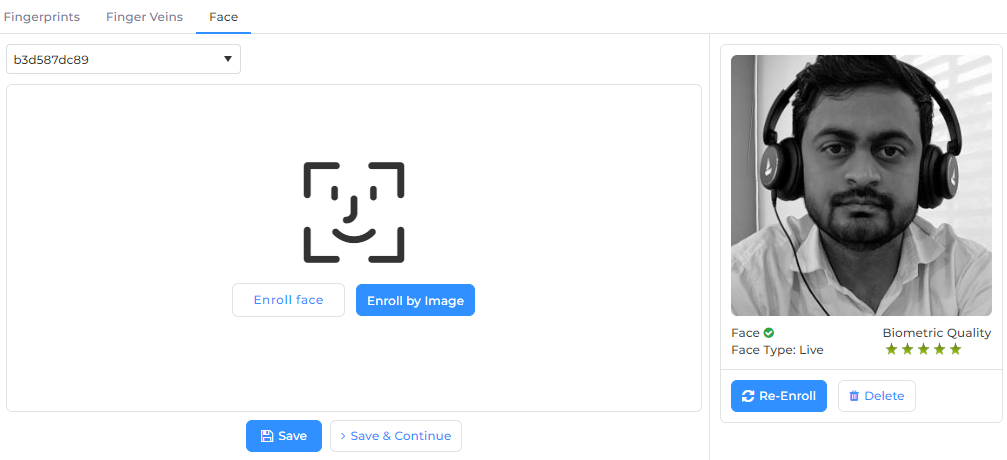
NOTE Invixium recommends saving Employees with face type as “Live” for optimal performance with the liveness detection setting turned ON.

STEP 4:
After successful enrollment of the face, click on Savebutton to save details in the IXM WEB database. Upon doing so, IXM WEB will display an "Application Logs" window with a success or failure message.

Click on Save & Continue button to continue to the next section.
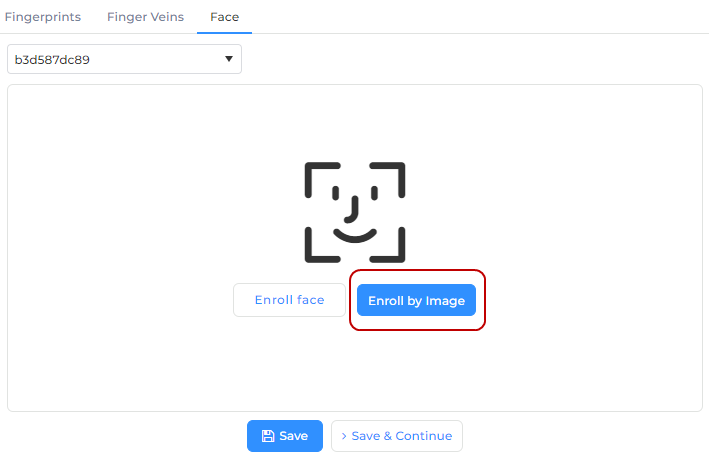
To enroll by image, follow the steps mentioned below:
STEP 1:
Click on Enroll by Image to start face enrollment.
STEP 2:
The application will open the File Explorer. Select the desired image from its respective path and click on "Open" button.
STEP 3:
Once the image is selected, it will be displayed on the right side of the application along with the Biometric Quality and Face Type (Live or Spoof).
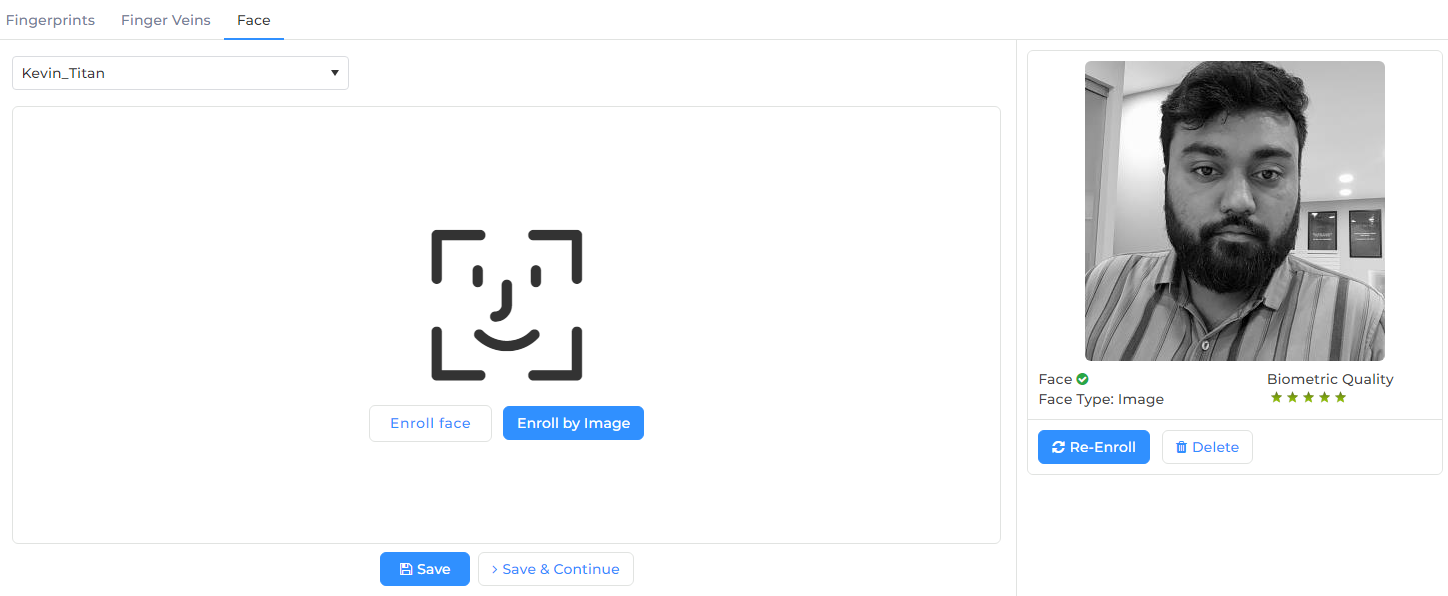
STEP 4:
After successful enrollment of the face, click on Savebutton to save details in the IXM WEB database. Upon doing so, IXM WEB will display an "Application Logs" window with a success or failure message.
NOTE
User can convert the following templates or image types to Invixium standard templates:
BMP
JPEG/JP2
PNG
The minimum resolution of the image file should be 250x250.
The minimum size of the image file should be 10 KB and maximum should be 5 MB.
Templates or images should fulfill certain quality criteria. Refer our guidelines for details...
Click on Save & Continue button to continue to the next section.
|
NOTE The following Fingerprint sensors are Invixium Certified Products, which can be used to initiate the Fingerprint Enrollment process: A. Lumidigm® M-Series
B. SecugenTM Hamster PLUS
|
Follow the steps mentioned below-
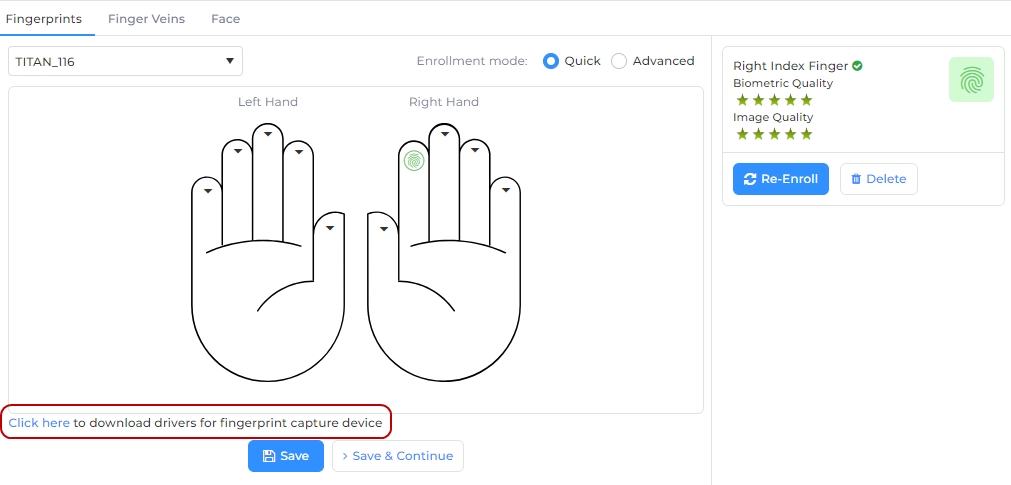
STEP 1:
In the “Biometric data” window if any of the fingerprint sensors are not detected in the Select Device dropdown, then click on the link at the bottom of the screen to download and install the fingerprint sensor driver. Click here to locate the link on the screen.
STEP 2:
Once the driver installation is complete, refresh the browser and you will get a USB sensor in the Device dropdown list.
STEP 3:
Hover the cursor over the two hands and click on the finger which you want to enroll for the employee. A “Place Finger” message will be displayed. Ask the employee to place their finger on the device.
STEP 4:
Once the finger is scanned, the fingerprint image will be displayed on the right side of the application along with the image quality.
|
NOTE Invixium recommends that each employee be enrolled with a quality of at least 4 stars for all biometrics. To achieve this, it is very important to place the finger in a way that the whole sensor area gets covered.

|
Once you have entered all the details, click on Save button to save details in the IXM WEB database. Upon doing so, IXM WEB will display a success or failure message.
Click on Save & Continue button to continue to the next section.
Screen Layout of Cards

The Cards section is used to capture the access card information of Employees.
Field Description of Cards
|
NOTE IXM WEB allows to create maximum 10 Cards for each Employee. |
If Card is being entered for the first time, the application will display following screen -
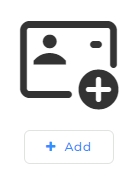
|
Click on Add button to add a Card. |
In case Card(s) are already saved, the application will display a list of Cards on the right side of the screen as follows -
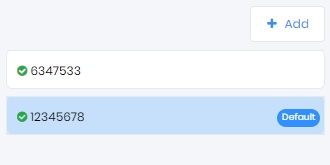
|
Click on Add button to add a new Card.
Or click on the respective Card Number to edit or delete the Card. You can also make it the default Card or add a Digital Card with same number. |
Following screen will be displayed to enter Card details -
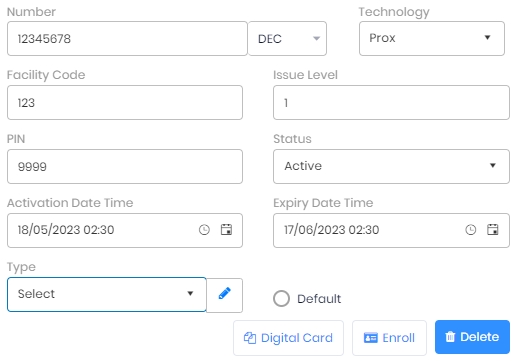
Number:
Enter the Card Number.
Technology:
Select the Technology from the dropdown list. Invixium provides following three Card technologies -
-
Smart
-
Prox
-
QR
In case of Smart / Prox Card, enter following details -
Facility Code:
Enter the Facility Code of the Card.
Issue Level:
Enter the Issue Level of the Card.
PIN:
Enter the PIN of the Card.
Status:
Select the Status of the Card from the dropdown list as follows -
Active
Inactive
Lost
Stolen
Only "Active" Cards will be granted access by the Device. Rest will not be granted access and appropriate message will be displayed by the application.
Activation Date Time:
It denotes the date and time from when the Card will be active.
Click on the calendar icon to select the date and time icon to select the time. After this start date and time, the Card will become active for the Employee. The Employee using this Card will be granted access by the Device after this date and time. If it is set to blank, then the Device will not consider any Activation date and time for the Card.
Expiry Date Time:
It denotes the Expiry date and time of he Card.
Click on the calendar icon to select the date and time icon to select the time. The Card will be active for the Employee till this date and time. Once this date and time passes, the Card will expire and the Device will deny access to the Employee. If it is set to blank, then the Device will not consider any Expiry date and time for that Card.
Type:
Denotes the type of Card. IXM WEB allows to bifurcate Cards into various types.
Select the type of Card from the dropdown list.
You can manage Card Types by clicking on
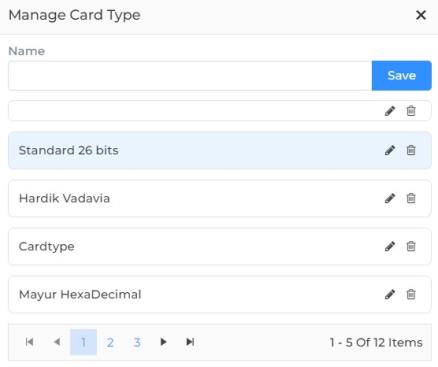
Name:
While adding a new Type, enter the Name of the Card Type.
Click on
Click on
Click on Save button to save the Card Type.
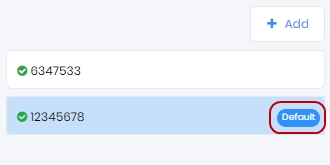
Default
Click on this option to make the currently selected Card as default card for the Employee. The Card will be tagged as "Default" in the list. Refer the image below:

Click on Digital Card button to create a Digital Card having the same number as the RFID Card. This allows an Employee to maintain a Digital as well as RFID card with the same number.
If a Digital Card already exists for an Employee, the application will display a confirmation message. Click on Yes button to proceed. As a result, the existing Digital Card will be overwritten with the new one and the Digital Card page will be displayed with details. Click on No button to discard the process.
This button will be displayed only when Account Details >> Digital Card option is selected.
Click on Enroll button to save the Card details.
Click on Delete button to delete the Card.
In case of QR Card, enter following details -
PIN:
Enter the PIN of the QR Card.
Status:
Select the Status of the Card from the dropdown list as follows -
Active
Inactive
Lost
Stolen
Only "Active" Cards will be granted access by the Device. Rest will not be granted access and appropriate message will be displayed by the application.
Activation Date Time:
It denotes the date and time from when the Card will be active.
Click on the calendar icon to select the date and time icon to select the time. After this start date and time, the Card will become active for the Employee. The Employee using this Card will be granted access by the Device after this date and time. If it is set to blank, then the Device will not consider any Activation date and time for the Card.
Expiry Date Time:
It denotes the Expiry date and time of the Card.
Click on the calendar icon to select the date and time icon to select the time. The Card will be active for the Employee till this date and time. Once this date and time passes, the Card will expire and the Device will deny access to the Employee. If it is set to blank, then the Device will not consider any Expiry date and time for that Card.
Click on Read QR Card button if you have the QR but don't know the it's Number. Following screen will be displayed -
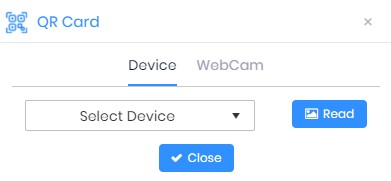
QR Code can be read either through Device or through WebCam.
To read QR Code from a Device, select the respective Device from the dropdown list. Click on Read button. As a result, the Device will open the camera and display "Show QR Card" message. Once you present the QR from the mobile, the Device will read it and display the QR Code in the Number text box.
To read QR Code from a WebCam, click on Read button. As a result, the application will open the camera. Once you present the QR from the mobile, the WebCam will read it and display the QR Code in the Number text box.
Click on Generate QR Card button if you have the number but do not have the QR for that number. The application will automatically generate a QR for the entered Number and display it as follows -
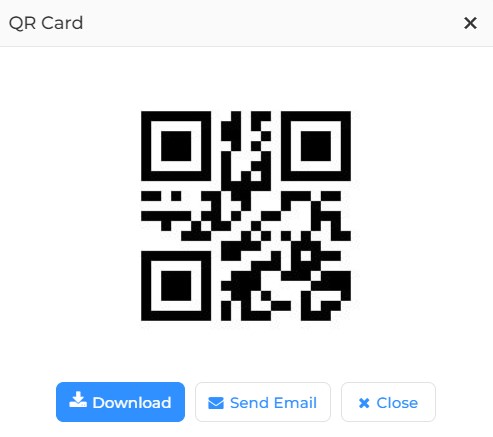
You can download or email the QR by clicking on the respective button.
Once you have entered all the details, click on Save button to save details in the IXM WEB database. Upon doing so, IXM WEB will display a success or failure message.
Click on Save & Continue button to continue to the next section.
|
NOTE
|
If Card is being entered for the first time, the application will display following screen -
|
Click on Add button to add a Card. |
In case a Digital Card is already saved, the application will display the Card Number on the right side of the screen as follows -
The following screen will be displayed to enter Card details:
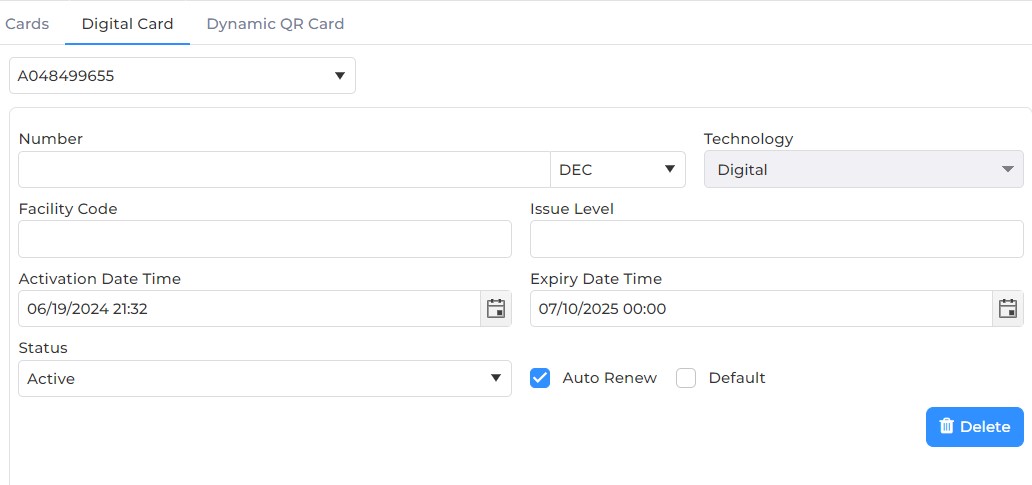
Number:
Denotes the Number of the Digital Card.
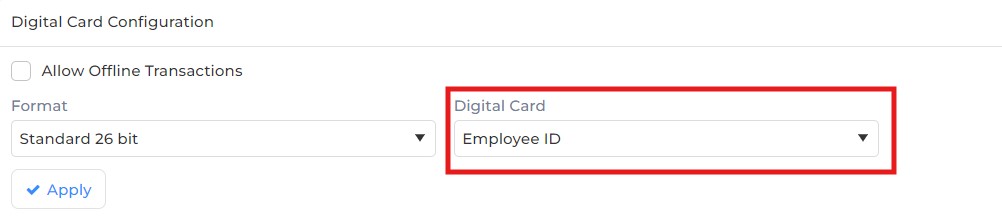
It is either generated automatically or entered manually, depending upon the method used to generate the Digital Card Number from General Settings >> IXM Mobile section. Refer the image below:
Technology:
Display "Digital" by default and can not be changed.
Activation Date Time:
It denotes the date and time from when the Card will be active.
Click on the calendar icon to select the date and time icon to select the time. After this start date and time, the Card will become active for the Employee. The Employee using this Card will be granted access by the Device after this date and time. If it is set to blank, then the Device will not consider any Activation date and time for the Card.
Expiry Date Time:
It denotes the Expiry date and time of he Card.
Click on the calendar icon to select the date and time icon to select the time. The Card will be active for the Employee till this date and time. Once this date and time passes, the Card will expire and the Device will deny access to the Employee. If it is set to blank, then the Device will not consider any Expiry date and time for that Card.
Status:
Select the Status of the Card from the dropdown list as follows -
-
Active
-
Inactive
-
Lost
-
Stolen
Only "Active" Cards will be granted access by the Device. Rest will not be granted access and appropriate message will be displayed by the application.
Auto Renew
Denotes if the Digital Card should be renewed automatically post expiration. Click on the checkbox to enable or disable the feature. A check mark in the box denotes the Digital Card will be renewed automatically once it is expired.
Click on Delete button to delete the Card.
Once you have entered all the details, click on Savebutton to save details in the IXM WEB database. Upon doing so, IXM WEB will display a success or failure message.
|
NOTE If IXM Mobile module is activated:
|
Click on Save & Continue button to continue to the next section.
|
NOTE
|
If Card is being entered for the first time, the application will display following screen -
|
Click on Add button to add a Card. |
In case a Dynamic QR Card is already saved, the application will display the Card Number on the right side of the screen as follows -
The following screen will be displayed to enter Card details:
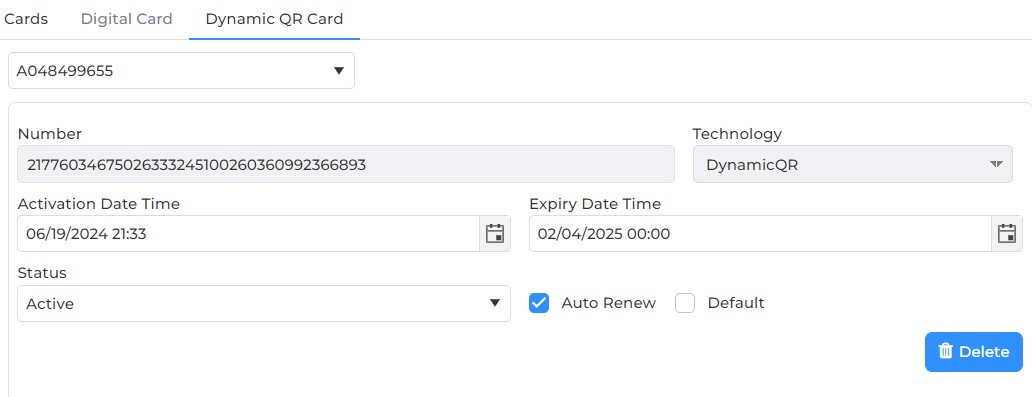
Number:
Displays the automatically generated Card Number.
Technology:
Display "DynamicQR" by default and can not be changed.
Activation Date Time:
It denotes the date and time from when the Card will be active.
Click on the calendar icon to select the date and time icon to select the time. After this start date and time, the Card will become active for the Employee. The Employee using this Card will be granted access by the Device after this date and time. If it is set to blank, then the Device will not consider any Activation date and time for the Card.
Expiry Date Time:
It denotes the Expiry date and time of he Card.
Click on the calendar icon to select the date and time icon to select the time. The Card will be active for the Employee till this date and time. Once this date and time passes, the Card will expire and the Device will deny access to the Employee. If it is set to blank, then the Device will not consider any Expiry date and time for that Card.
Status:
Select the Status of the Card from the dropdown list as follows -
-
Active
-
Inactive
-
Lost
-
Stolen
Only "Active" Cards will be granted access by the Device. Rest will not be granted access and appropriate message will be displayed by the application.
Auto Renew
Denotes if the Dynamic QR Card should be renewed automatically post expiration. Click on the checkbox to enable or disable the feature. A check mark in the box denotes the Dynamic QR Card will be renewed automatically once it is expired.
Click on Delete button to delete the Card.
Once you have entered all the details, click on Savebutton to save details in the IXM WEB database. Upon doing so, IXM WEB will display a success or failure message.
|
NOTE If IXM Mobile module is activated:
|
Click on Save & Continue button to continue to the next section.
Screen Layout of IXM Time
|
NOTE
|
The IXM Time section is used to define attendance-related settings for individuals.
Field Description of IXM Time
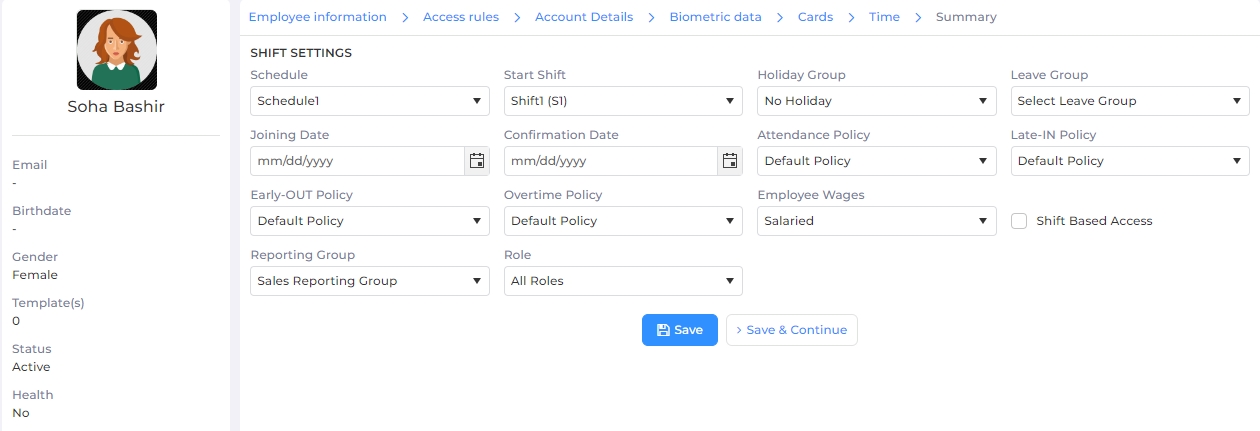
SHIFT SETTINGS
Schedule:
Select and assign a Schedule to the Employee. The week off and pattern of shift will be defined based on the assigned schedule.
NOTE A Schedule can be created from IXM TIME >> Shift Settings >> Schedule section.
Start Shift:
Select and assign a Shift to the Employee. Based on the assigned shift and policies, attendance will be defined.
NOTE Shifts be created from IXM TIME >> Shift Settings >> Shift section.
Holiday Group:
Select and assign a Holiday Group to the Employee. A holiday will be considered based on created holidays in selected groups.
NOTE Holiday Groups can be created from Company schedule >> Holiday Schedule section.
Leave Group:
Select and assign Leave Group to the Employee. Applicable leave type will be decided based on the Leave Group.
Joining Date:
Enter the Joining Date of the Employee. You can either enter the date or click on the calender icon to select the date.
Confirmation Date:
Enter the Confirmation Date of the Employee. You can either enter the date or click on the calender icon to select the date.
Attendance Policy:
Select and assign an Attendance Policy for the Employee. By default, “Default Policy” is assigned to the Employee. Attendance of the day and leave transaction period are defined based on the assigned Attendance Policy and Shift.
NOTE Attendance Policy can be created from IXM Time >> Policies >> Attendance section.
Late-IN Policy:
Select and assign a Late-In Policy for the Employee. By default, “Default Policy” is assigned to the Employee. Late In time and duration are defined based on the assigned Late In Policy and Shift.
NOTE Late In Policies can be created from IXM Time >> Policies >> Late IN section.
Entry-OUT Policy:
Select and assign an Early-Out Policy for the Employee. By default, “Default Policy” is assigned to the Employee. Early Out time and duration are defined based on the assigned Early Out Policy.
NOTE Early Out Policies can be created from IXM Time >> Policies >> Early OUT section.
Overtime Policy:
Select and assign an Overtime Policy for the Employee. By default, “Default Policy” is assigned to the Employee. The overtime of an individual will be calculated based on the assigned Overtime Policies.
NOTE Overtime Policies can be created from IXM Time >> Policies >> Overtime Policy section.
Employee Wages:
Select whether the Employee's wages are to be considered as "Salaried" or as "Hourly" by selecting from the dropdown list.
Shift Based Access
Denotes whether or not the Employee has access to the Device on the basis of Shift.
Click on the checkbox to enable or disable the feature. A check mark in the box indicates the Employee will get access to the Device based on allotted Shifts.
Reporting Group:
Select the appropriate Reporting Group of the Employee from the dropdown list.
It allows the individual's reporting group manager to view Employee's attendance, approve or reject attendance corrections, leave, and overtime for employees working under him / her.
NOTE Reporting Groups can be created from IXM Time >> Reporting Structure >> Reporting Group section.
Once you have entered all the details, click on Savebutton to save details in the IXM WEB database. Upon doing so, IXM WEB will display a success or failure message.
Screen Layout of Summary
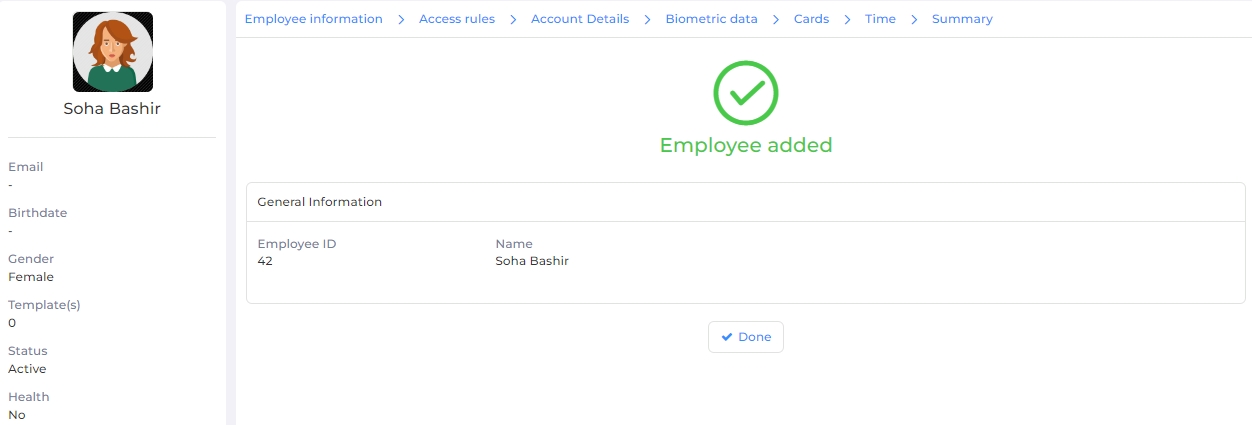
Field Description of Summary
General information about the new Employee will be displayed here.
Click on Add New button to add another Employee or click on Done button to complete the process and IXM WEB will display an "Application Logs" window with success or failure message as follows -
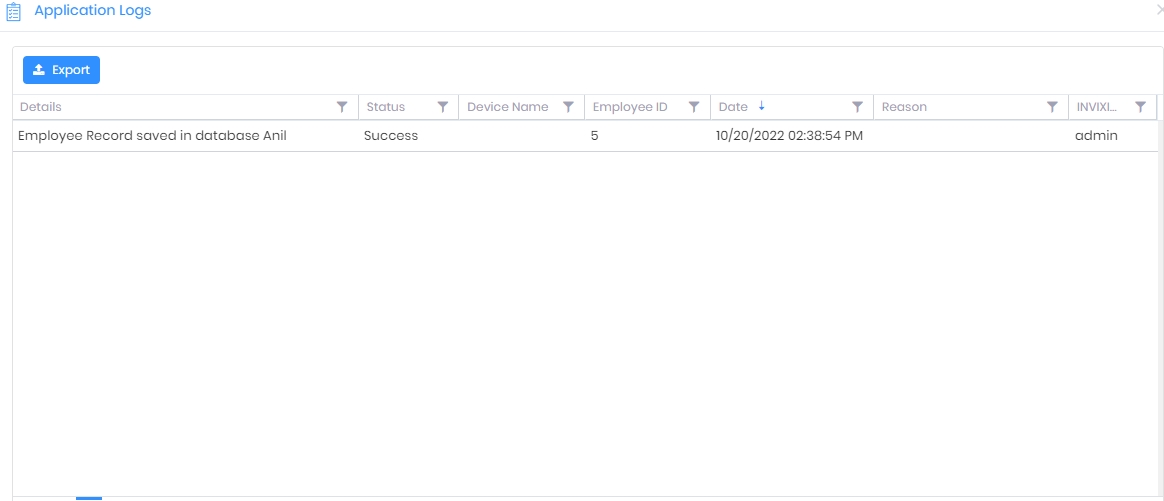
Click on X icon on the top right corner of the screen to close it.
On successful completion, the new Employee will be added and displayed in the Employee List.